How to create a new user?
Task
Create a new user
Introduction
Bracken has its own mechanism for representing user accounts and we understand that clients who want to integrate with us have their own way of representing their user accounts.
This creates two separate representations for user accounts (one on each side of the integration), and requires an association between the two systems.
The most common way is for the client to create a user account in Bracken, when a client-side user account is created the result is that both user accounts share the same username and is stored within the Bracken system.
Create a new user via the API
Another way is to create a new user via the API.
The API Reference section contains all of the controllers and API endpoints.
Find the Endpoint
Open the Public User controller in the API Reference section.
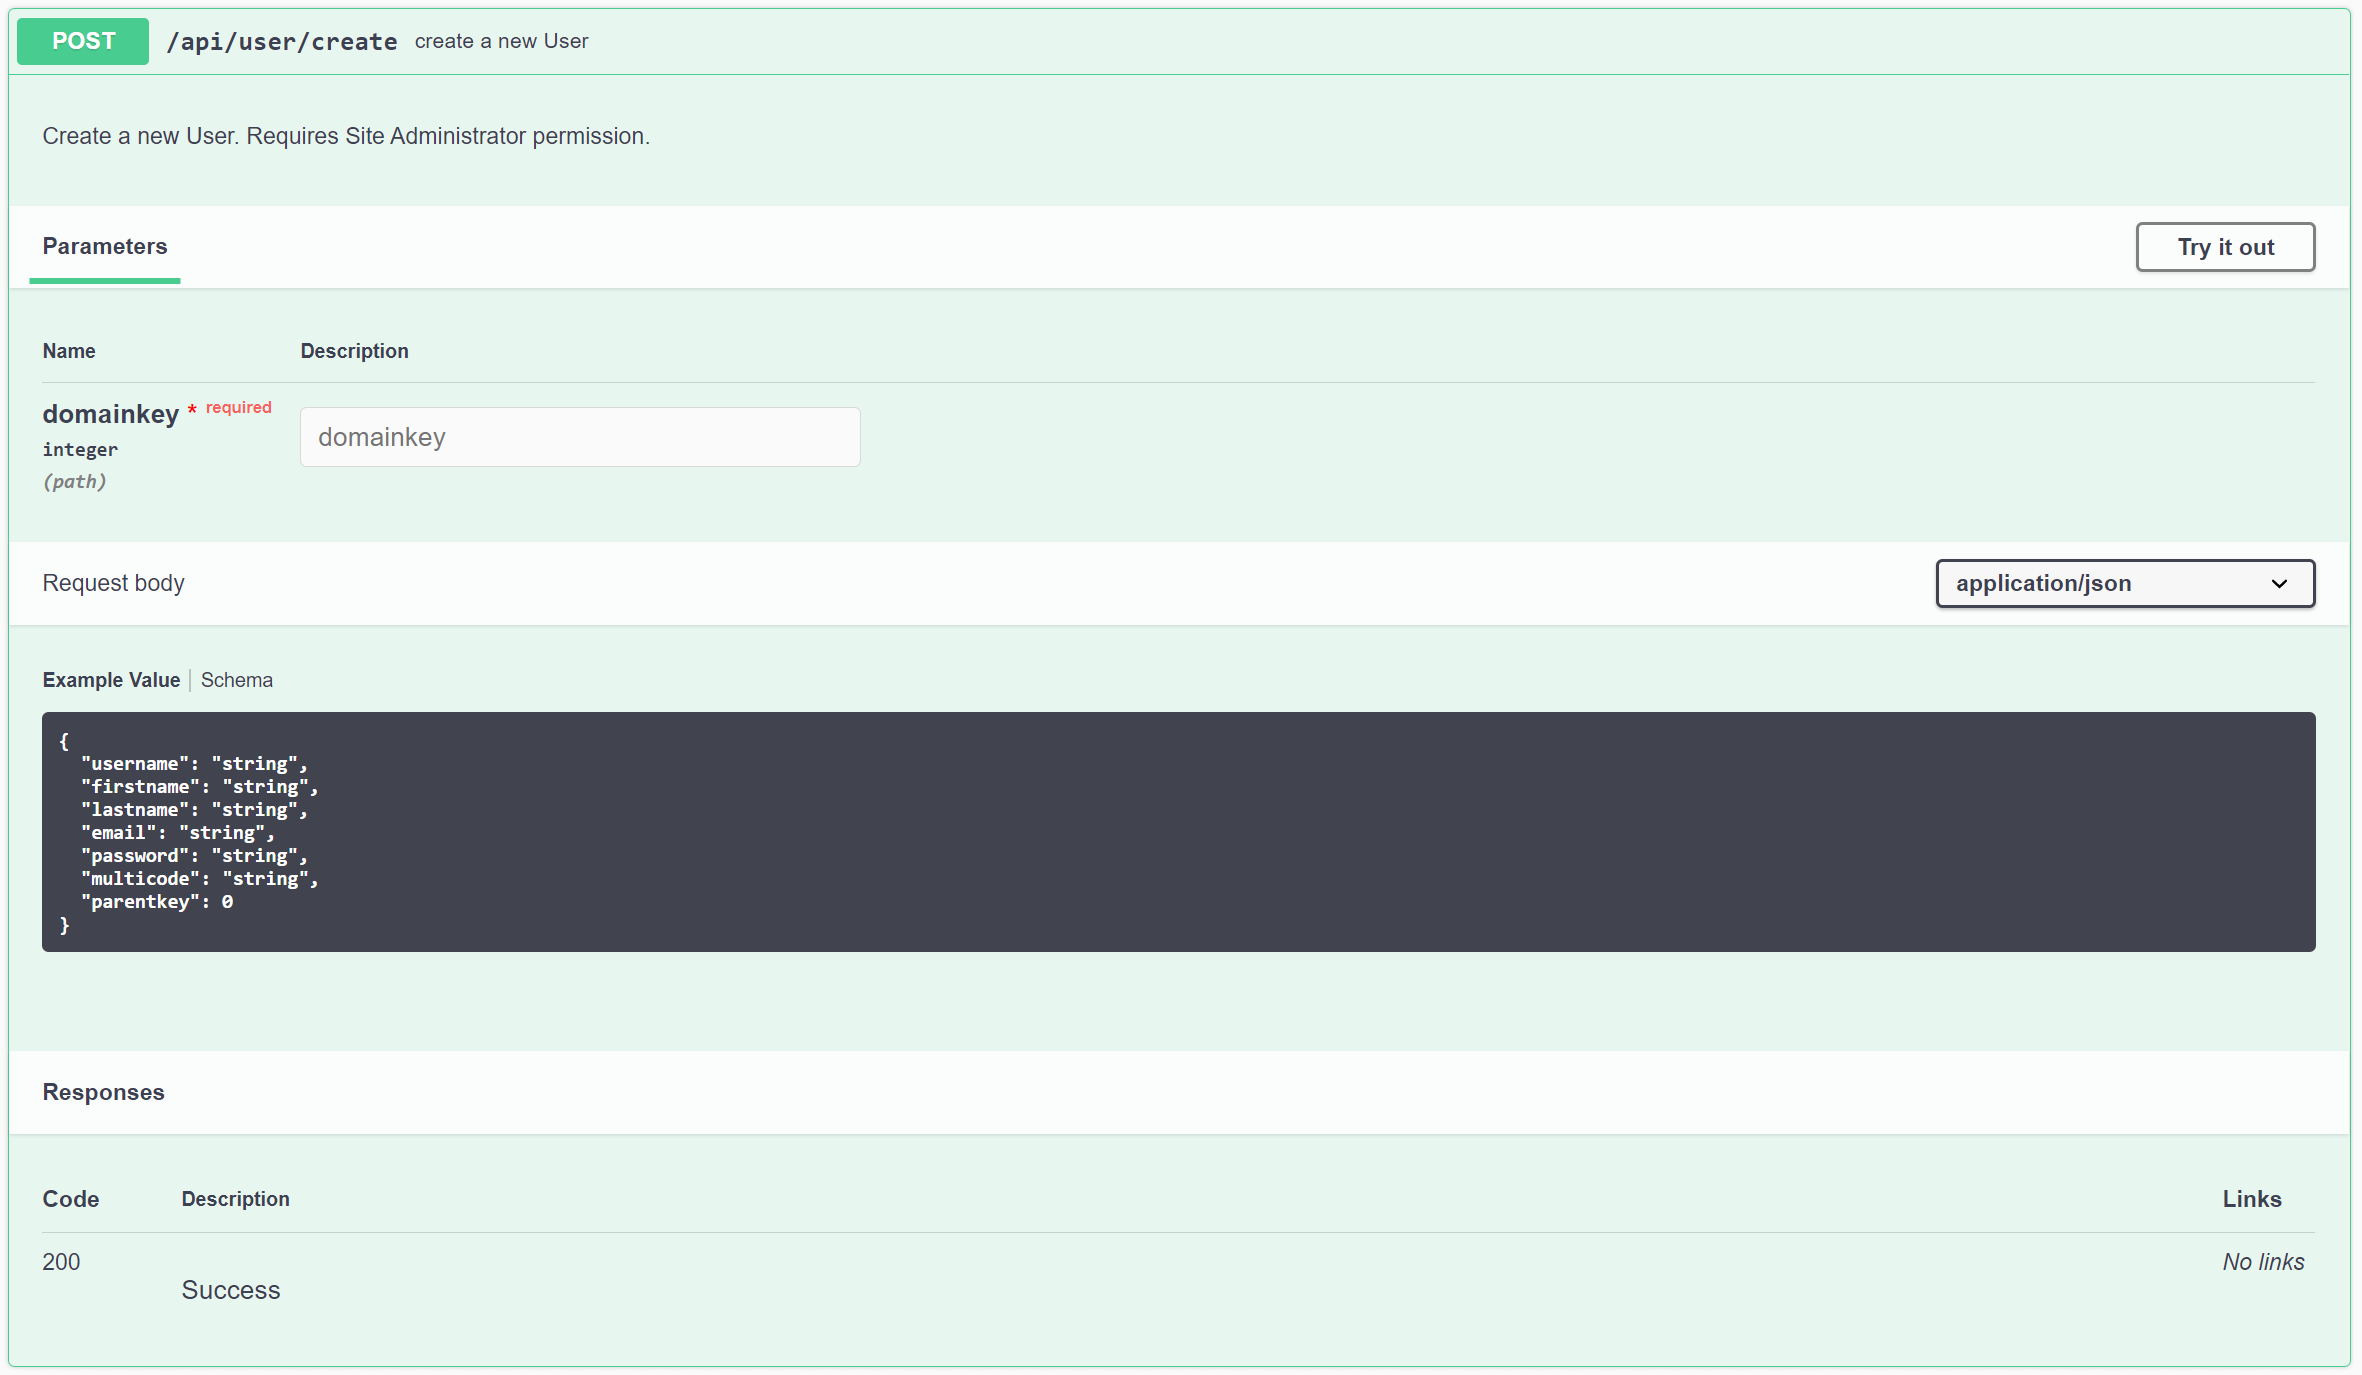
Scroll and find ‘/api/user/create’ endpoint. 
Click on the endpoint and it will open up to show more information.
 Here we can see what this endpoint requires and the values that can be set for the user accounts.
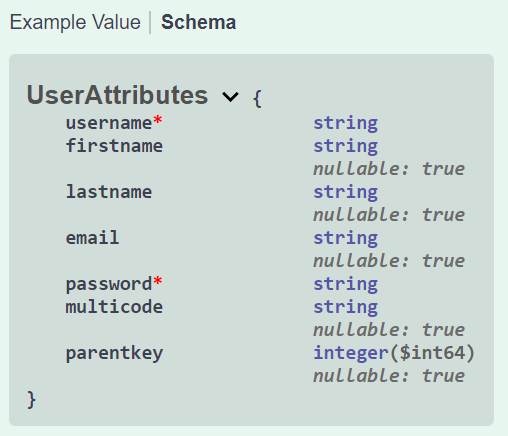
If you click ‘Schema’ next to ‘Example Value’ this gives more information of what type each attribute accepts.

When we make a new user, we will fill in these values in the JSON body that we post to the Bracken API.
Code
Here is example code in Python (3.6.8) of how to create a new user via the API.
# python 3.6.8
import requests
from requests_oauthlib import OAuth2Session
from oauthlib.oauth2 import BackendApplicationClient

# domainkey is an integer
domainkey = YOUR DOMAIN KEY
client_id = 'YOUR client_id'
client_secret = 'YOU client_secret'

# Authorization
client = BackendApplicationClient(client_id=client_id)
oauth = OAuth2Session(client=client)
token = oauth.fetch_token(token_url='https://identity.brackenlearning.com/connect/token', client_id=client_id,client_secret=client_secret)

# Getting the access token
s = requests.Session()
s.headers.update({'Authorization': 'Bearer {}'.format(token['access_token'])})

# using the endpoint to create a new user
urlCreateUser = 'https://api.brackenlearning.com/api/user/create/domain/{0}'.format(domainkey)

response = s.post(urlCreateUser, json={
  "username": "Test-User",
  "firstname": "Test",
  "lastname": "User",
  "email": "testuser@thetarngroup.com",
  "password": "HxTqaR3L72Zha1!iOlapKJ",
  "multicode": "groups-1A",
})

print(response)
print(response.json())
This includes getting the access token to be able to communicate with the Bracken API.
The part to focus on for this tutorial is this line.
# using the endpoint to create a new user
urlCreateUser = 'https://api.brackenlearning.com/api/user/create/domain/{0}'.format(domainkey)
Which is where we use the endpoint that we found in the API Reference document to create a new user.
We create a new user by posting our information to the endpoint.
response = s.post(urlCreateUser, json={
  "username": "Test-User",
  "firstname": "Test",
  "lastname": "User",
  "email": "testuser@thetarngroup.com",
  "password": "HxTqaR3L72Zha1!iOlapKJ",
  "multicode": "groups-1A",
})
In the above code we can see mock information that we are passing as a JSON body to the ‘api/user/create’ endpoint. If we look at our list of users again we will see a new user called ‘Test-User’.
It is important to note the attribute called ‘multicode’.
When we create a new user we can assign them to one or more groups at the time of creation by specifying the ‘multicode’ that is associated with those groups. You do need to have a ‘multicode’ already set up to do this.
Response
The [200] response for this call will look like the example below. Please note all User Based Permissions will default to false when the new user is created.
{
  "userkey": 0,
  "username": "Test-User",
  "firstname": "Test",
  "lastname": "User",
  "email": "testuser@thetarngroup.com",
  "verifiedemail": "testuser@thetarngroup.com",
  "password": "HxTqaR3L72Zha1!iOlapKJ",
  "parentkey": 0,
  "friendlyname": "Test User",
  "iconkey": "3fa85f64-5717-4562-b3fc-2c963f66afa6",
  "storage": 0,
  "mobile": "0000000000",
  "domainkey": YOUR_DOMAIN_KEY,
  "lastlogin": "2020-11-24T22:54:30.998Z",
  "internaluser": false,
  "masteraccess": false,
  "groupaccess": false,
  "designaccess": false,
  "siteaccess": false,
  "authoraccess": false,
  "markeraccess": false
}
Linked Accounts
In the tutorial the attribute parentkey has not been included in the JSON body as you only include a parent key when creating a user that is connected to a linked account.
Linked accounts are for when a user doesn’t register with an email but their account still needs to be verified. To create a linked account the account must have a ‘parent’ account that is verified and it means that the ‘parent’ account will receive emails if the linked account needs to reset their password.
To create a linked account follow the same steps in the tutorial above but specify the parentkey in the JSON body with the parent of the linked account you are creating.
Thank you for reading the tutorial on how to create a new user.